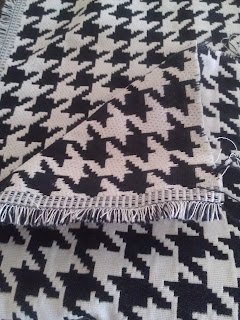
Along with loving hounds-tooth fabric I love a good fabric sale! I had gone to Hobby Lobby seeking a finale' for my Mom who is saving an antique lampshade when I stumbled upon a box of fabric pieces leftover for sale. In this box of wonder I found 1 and 3/4 yard of hounds-tooth upholstery fabric. And I thought hmmm...new clutch yes please!
Tools:
outside fabric for clutch (I would use a thicker fabric for sturdiness)
inside fabric: think either cotton or satiny- I used an old satiny shirt from the thrift store a steal at .29 cents!
Button of choice (I used a large chunky button found as a single button from Joann's)
snaps: (I used basic snaps with a snap machine but you could use a magnet or larger snap)
scissors
pin
thread to match fabric
Step 1: I began by deciding the shape of my clutch. I laid the hounds-tooth fabric out and trimmed to the size I needed. Make sure to cut off any loose ends to ensure nothing is sticking out on the finished project.
Step 2: I took the old stain ladies shirt and cut the back out along the seam of the arms and neck of the shirt.
Step 3: I began to pin the fabric together so that the satin would be on the inside and edged with the hounds-tooth fabric.
Step 4: Once the fabric was pinned I began to stitch around the edges leaving .5 inch for me trim before folding the edges over.
Step 5: Once the red interior fabric was completely attached I trimmed the excess and folded the right and left sides to create a large rectangular envelope shape. I had 1 inch sides.
Step 6: To finish the clutch I used a "random zig-zag" stitch shown here random zig-zag stitch so that it would mimic the hounds-tooth print.I sewed the left and right side about 4-5 inches up each side with a 1 in trim on each side. I left the top open so that I could attach the snaps and button.
Step 7: I used a plastic snap attachment to attach the snaps to the top (flap) and bottom (base) of the clutch.
Step 8: After attaching both snaps I folded the flap about 2 inches again looking like a straight flap envelope and stitched the trim edge around the flap.
Step 9: Adding the button: for this piece it was purely decoration but could be done as the actual closure on the clutch.
Here's the finished project!
Another success! There are a few things I would change on the next one like using a magnetic clasp and folding the trim more closely so that no edge shows when opening the inside.
But very happy and ready to try it out this weekend! :)


No comments:
Post a Comment